
Thanksgiving
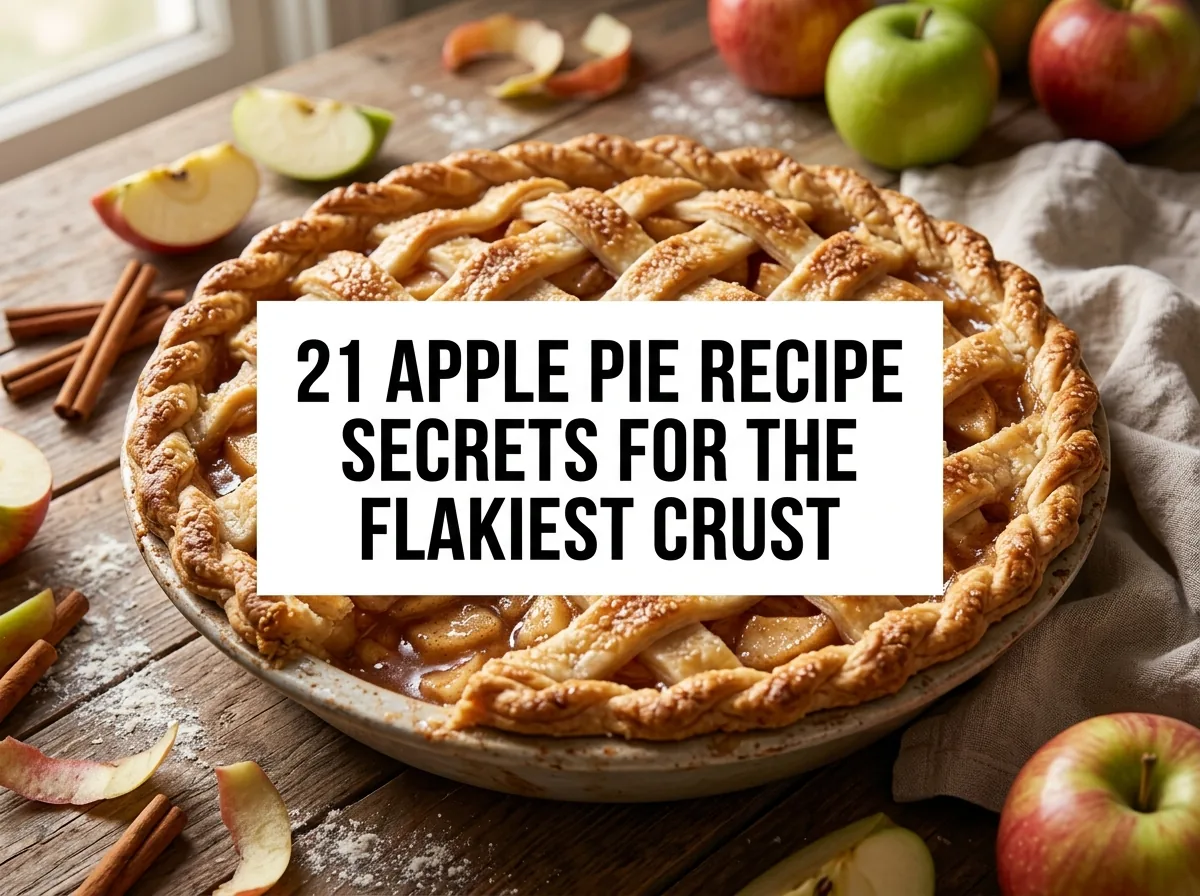
21 Apple Pie Recipe Secrets for the Flakiest Crust
On this page
A flaky apple pie is not about one magical ingredient; it is about keeping the dough tender while getting enough heat into the pastry. These small decisions matter more than decorative lattice work, especially when the filling is full of juicy apples.
The following twenty-one techniques support the same 9-inch double-crust apple pie method provided below. Keep the ingredient amounts together as one recipe rather than combining quantities from different variations.
A Complete 9-Inch Double-Crust Apple Pie
This is one workable base formula for the 21 techniques below. The quantities and bake cues are adapted in original wording from King Arthur Baking’s apple pie and all-butter crust formulas, with cross-checks against Bon Appétit’s apple pie method. This article does not claim that the author personally tested the recipe.
Prep time: About 45 minutes active work. Dough chilling: At least 30 minutes, plus about 10 minutes once assembled. Bake time: About 55 to 65 minutes. Cooling: About 3 to 4 hours. Total elapsed time: About 5 to 6 hours including chilling and cooling. Yield: One deep 9-inch (23cm) pie, about 8 slices.
Equipment: Large bowl, pastry cutter or fingertips, rolling pin, 9-inch pie dish at least 1 1/2 inches deep, parchment-lined rimmed baking sheet, pastry brush, and wire rack.
Ingredients for the crust
- 2 1/2 cups (300g) all-purpose flour
- 1 tsp table salt
- 1 cup (227g) cold unsalted butter, cubed
- 6 to 12 tbsp (85 to 170g) ice water, only as much as needed
Ingredients for the filling and finish
- 8 cups (about 904g) peeled, cored, and evenly sliced firm apples, from about 3 1/4 lb whole apples
- 2 tbsp (30ml) lemon juice
- 3/4 cup (150g) granulated sugar
- 2 tbsp (14g) all-purpose flour
- 2 tbsp (14g) cornstarch
- 1/2 tsp table salt
- 1 tsp ground cinnamon
- 1/4 tsp ground nutmeg
- 1/4 tsp ground allspice
- 2 tbsp (28g) butter, cut into small pieces
- 1 large egg and 1 tbsp (15ml) water for the egg wash
- 1 tbsp coarse sugar for the top, optional
Numbered method
- Make the pastry. Stir the flour and salt together. Work the cold butter into the flour until there are visible pea-size pieces. Add 6 tbsp ice water, tossing with a fork, and add more water 1 tbsp at a time only until a squeezed handful of dough holds together.
- Chill the dough. Divide into two portions and flatten into discs. Wrap and refrigerate for at least 30 minutes. If the dough becomes too firm to roll, leave it at room temperature briefly until pliable, but still cool.
- Prepare the apples. Heat the oven to 425°F (220°C). Toss 8 cups prepared apple slices with the lemon juice. In a separate small bowl, whisk the sugar, flour, cornstarch, salt, cinnamon, nutmeg, and allspice, then coat the apples evenly.
- Line the dish. Roll the first disc into a round roughly 12 inches across, about 1/8 inch thick. Ease it into the pie dish without stretching; leave an overhang around the rim.
- Fill and cover. Spoon in all the apple mixture, including juices, and dot with 2 tbsp butter. Roll the second disc, lay it over the filling, trim and crimp the joined edges, and cut several clear steam vents in the top.
- Chill and finish. Refrigerate the assembled pie about 10 minutes. Set the dish on a parchment-lined room-temperature rimmed baking sheet. Brush the upper crust lightly with the egg beaten with 1 tbsp water; sprinkle with coarse sugar if desired.
- Bake. Bake at 425°F (220°C) for 20 minutes, then lower to 375°F (190°C) for approximately 35 to 45 minutes more. The crust should be deep golden brown, and thick apple juices should bubble vigorously through the vents. Cover the edges loosely with foil if they darken before the filling is cooked.
- Cool completely. Transfer the pie to a wire rack and cool for roughly 3 to 4 hours before cutting. The filling thickens during this rest.
Storage: This recipe contains fruit, not custard. Follow current local food-safety guidance and refrigerate if kept beyond same-day service or if serving conditions are warm. Store covered in the refrigerator and reheat individual slices as desired. If you add cream or custard, follow the more restrictive dairy or egg storage guidance.
Substitutions: A blend of tart and sweet-tart baking apples works. Use cornstarch and flour in the specified proportions rather than exchanging them at random. Frozen pre-made pastry may be used only if the package supports a 9-inch double-crust pie; follow its own baking instructions where they differ.
21 Techniques for Flaky Crust and Well-Set Filling
1. Use Very Cold Butter
Flaky pastry depends on solid fat separating thin layers of dough. Warm butter disappears into the flour and leaves a less layered crust.
Cut 1 cup (227g) cold unsalted butter into small cubes and work it into 2 1/2 cups (300g) all-purpose flour with 1 tsp table salt. Keep the butter pieces roughly pea-sized rather than blending everything into fine crumbs.
If your kitchen is warm, chill the mixing bowl too. Stop and refrigerate the dough whenever it feels greasy.
2. Measure Flour Without Packing
Too much flour makes a pie shell dry and difficult to roll. A small measuring mistake can change the whole dough.
For this double crust, weigh 300g all-purpose flour rather than scooping firmly into a cup. If using cups, spoon flour in loosely and level it off with a knife.
Hold back extra bench flour during rolling. Add only a light dusting whenever the dough sticks.
3. Add Ice Water One Spoon at a Time
Pie dough needs just enough moisture to hold together. Too much water encourages a chewy texture.
Mix 1 tbsp ice water at a time into the butter-flour mixture, beginning with 6 tbsp total. Stop when a squeezed handful stays together even if the dough still looks a little shaggy.
Different flour brands absorb water differently, so judge by feel. Avoid kneading the dough smooth like bread.
4. Leave Visible Butter Flecks
Those flat streaks of butter become flaky pockets in the oven. A perfectly uniform dough often bakes up less layered.
Toss cold butter through the flour with a pastry cutter or fingertips until most pieces range from peas to thin nickels. During rolling, press any large exposed chunks back into the dough.
Butter should stay cold, not melt on your fingers. A bench scraper helps move dough without warming it.
5. Flatten the Dough into Discs
A thick round ball takes more rolling and often cracks at the edges. Flat discs chill evenly and start closer to pie shape.
Divide the mixed dough into two portions and press each into a disc about 1 inch thick. Wrap separately and refrigerate for at least 30 minutes before rolling.
Make the bottom disc slightly larger than the top. That extra dough helps cover the sloping sides of the pan.
6. Let Chilled Dough Relax Briefly
Rock-hard dough can split when your rolling pin hits it. A few minutes on the counter make it flexible without softening the butter much.
Rest a refrigerated dough disc for about 5 to 10 minutes, depending on room temperature. Roll from the center outward, turning it a quarter turn after every few strokes.
If the edges crack, press them together instead of adding water. Return the dough to the refrigerator if it becomes sticky.
7. Roll the Crust to Even Thickness
Thin patches bake too fast while thick spots stay doughy. Consistent pastry makes neat slices and dependable baking.
Roll each disc to about 1/8 inch thick on a lightly floured surface. For a 9-inch pie plate, aim for a bottom round roughly 12 inches across.
Measure once with a ruler if you are new to pastry. Use the rolling pin to lift the sheet instead of stretching it by hand.
8. Never Stretch Pastry into the Plate
Stretched dough tries to snap back in the oven. That is a common reason for shrinking edges.
Lower the rolled sheet into the pan with plenty of slack, then gently ease it into the corner where the base meets the side. Let the pastry settle naturally before trimming the excess.
A glass dish makes bottom browning easier to inspect. Avoid tugging the dough tight along the rim.
9. Choose Two Apple Varieties
One apple type rarely gives every quality you want. A mix offers structure, sweetness, and a little tartness.
Use 8 cups (about 904g) peeled, sliced apples for a deep 9-inch pie, starting with about 3 1/4 lb whole apples. Use a mix of tart and firm sweet-tart varieties, such as Granny Smith and Honeycrisp. Slice them evenly so the filling cooks at a similar rate.
Taste the raw apples before choosing sugar. Very sweet fruit may need less sweetener than a tart mixture.
10. Slice Apples a Quarter Inch Thick
Tiny pieces collapse into applesauce and thick wedges can stay crunchy. Medium slices produce tender layers that still look like fruit.
Peel and core the apples, then cut into slices about 1/4 inch thick. Toss the slices with 1 tbsp lemon juice while you prepare the rest of the filling.
A sharp knife is often more consistent than a very thin mandoline setting. Keep the pieces similar rather than worrying about perfect shapes.
11. Mix the Filling Without Losing Its Thickener
Apples release juice after you add sugar. This version uses flour and cornstarch together so the moisture thickens during baking.
Toss the prepared apples with 2 tbsp lemon juice, then coat with the pre-mixed sugar, flour, cornstarch, salt, and spices. Transfer everything to the pie shell, including any juice in the bowl, rather than draining away the measured thickener.
Some apple pie recipes deliberately macerate apples and reduce the juices. That is a different, valid method, but do not mix its quantities with this formula.
12. Use Enough Thickener, Not Too Much
A good filling should slice rather than spill, but it should not feel gummy. The thickener has to match the amount of juicy fruit.
For 8 cups (about 904g) sliced apples, mix 2 tbsp (14g) all-purpose flour with 2 tbsp (14g) cornstarch, then combine with the measured sugar and seasonings. Coat the apples evenly.
Bake until the filling bubbles vigorously through the vents. Cool completely before deciding whether it has set.
13. Balance Cinnamon with Acid
A pie overloaded with spice can hide the apple flavor. A little lemon sharpens the filling without tasting sour.
For 8 cups prepared apples, use 1 tsp cinnamon, 1/4 tsp nutmeg, 1/4 tsp allspice, and 2 tbsp lemon juice. Taste a thin raw apple slice coated in the mixture before filling the pie.
Add nutmeg sparingly because it is powerful. Skip strong clove if you prefer a bright fruit-forward pie.
14. Keep the Filling Below the Rim
An overfilled pie can push juice into the edges and leak in the oven. A gentle mound cooks more evenly than a towering pile.
Arrange the measured 8 cups prepared apples snugly in a 9-inch pie dish at least 1 1/2 inches deep, allowing a gentle mound above the rim. Dot the top with 1 tbsp butter before adding the upper crust.
Use a deeper pie plate if your apples are especially bulky. Set aside any extra fruit for a small skillet dessert.
15. Chill the Assembled Pie
Dough warms quickly while you arrange apples and crimp edges. A short chill helps the crust keep its shape as the oven heats.
After sealing and venting the top, refrigerate the assembled pie for about 10 minutes. Brush with egg wash just before it goes into the hot oven.
Do not leave an unbaked egg-washed pie on the counter. Keep the pastry cold while the oven preheats.
16. Use a Rimmed Baking Sheet Safely
A rimmed baking sheet catches overflowing apple juice and makes the pie easier to move. The dish material matters more than preheating the tray.
Set the pie dish on a parchment-lined, room-temperature rimmed metal sheet, then transfer both to the preheated 425°F (220°C) oven. Keep a chilled glass or ceramic pie dish away from a preheated metal sheet, baking stone, or steel to avoid thermal shock.
Use oven mitts when moving the pan. If your bakeware manufacturer gives different temperature-change instructions, follow those.
17. Start Hot, Then Lower the Heat
High heat first encourages puffed pastry before the butter leaks out. Lower heat later lets the center finish without burning the crust.
Bake this double-crust 9-inch apple pie at 425°F (220°C) for 20 minutes, then reduce to 375°F (190°C) and continue for about 35 to 45 minutes. Look for juices bubbling through the vents and deep golden pastry rather than relying on the clock alone.
Shield the edge with foil if it browns early. Oven temperatures vary, so watch the pie in the final 15 minutes.
18. Brush with a Thin Egg Wash
A glossy crust looks bakery-finished even without complicated shaping. Too much wash can glue the edge to the pan.
Beat 1 egg with 1 tbsp (15ml) water and brush a thin film over the upper crust after chilling. Sprinkle on 1 tbsp coarse sugar if you like a light crunch.
Avoid puddles in the crimped edge. A silicone brush makes it easy to apply an even coat.
19. Cut Clear Steam Vents
Steam needs somewhere to escape as the apple filling cooks. Without vents, a full top crust can blister and tear.
Cut four or five 1-inch slashes near the center of the top pastry, or weave a lattice with visible gaps. Seal and crimp the outside edge firmly so the vents become the main escape route.
Keep the cuts away from the rim where juices tend to overflow. Decorative leaves can sit between the vents without covering them.
20. Wait Until the Filling Bubbles
A brown crust alone does not prove that the thickened apples are cooked. The filling needs enough heat for the starch to work.
Keep the pie in the oven until thick juices actively bubble through several top slits and the pastry looks deep golden. If the top colors too soon, cover loosely with foil while continuing to bake.
Give deep-dish pies additional time when needed. A clear glass pie plate helps you confirm that the bottom has browned.
21. Cool Before Slicing and Reheat Gently
The hardest step is leaving a fragrant pie untouched. Cutting it straight from the oven often sends the filling across the plate.
Cool the baked pie completely on a rack, usually 3 to 4 hours, so the juices set before slicing. For warm slices, reheat portions gently and serve promptly.
Refrigerate the pie after it has cooled if keeping it longer than a day or if your recipe includes perishable additions. Reheating individual slices preserves the rest of the pie.
Final Thoughts
A good apple pie starts with cold pastry and ends with enough cooling time to let the filling settle. Practice two or three of these techniques at a time, then keep the ones that make the biggest difference in your kitchen.
Recipe References
The base recipe and temperature checks were cross-referenced using two independent recipe publishers. Their formulas are not identical, and this article consistently uses the ingredient amounts in its single base method rather than mixing the two methods.
- King Arthur Baking, Apple Pie and All-Butter Pie Crust.
- Bon Appétit, BA’s Best Apple Pie.
Frequently asked questions
What fat makes the flakiest apple pie crust?
Cold butter makes flavorful flaky layers when pieces remain visible in the dough; some bakers use a little shortening for easier handling.
How much water should go into pie crust?
For 2 1/2 cups (300g) flour and 1 cup (227g) butter, begin with 6 tbsp (85g) ice water, then add by the tablespoon until the dough holds together.
Do not force in all the water.
Why is the bottom of my apple pie soggy?
Excess fruit liquid, underbaking, and slicing before the filling sets can all cause a soggy base.
Use a rimmed tray underneath and bake until the center bubbles.
Do not put a chilled glass pie plate on a preheated metal tray or stone.
How long should an apple pie cool before cutting?
Cool the finished pie completely on a rack, typically 3 to 4 hours, before slicing so the thickened filling can set.